Before you begin
Open Import Number
Step 1 — Open More
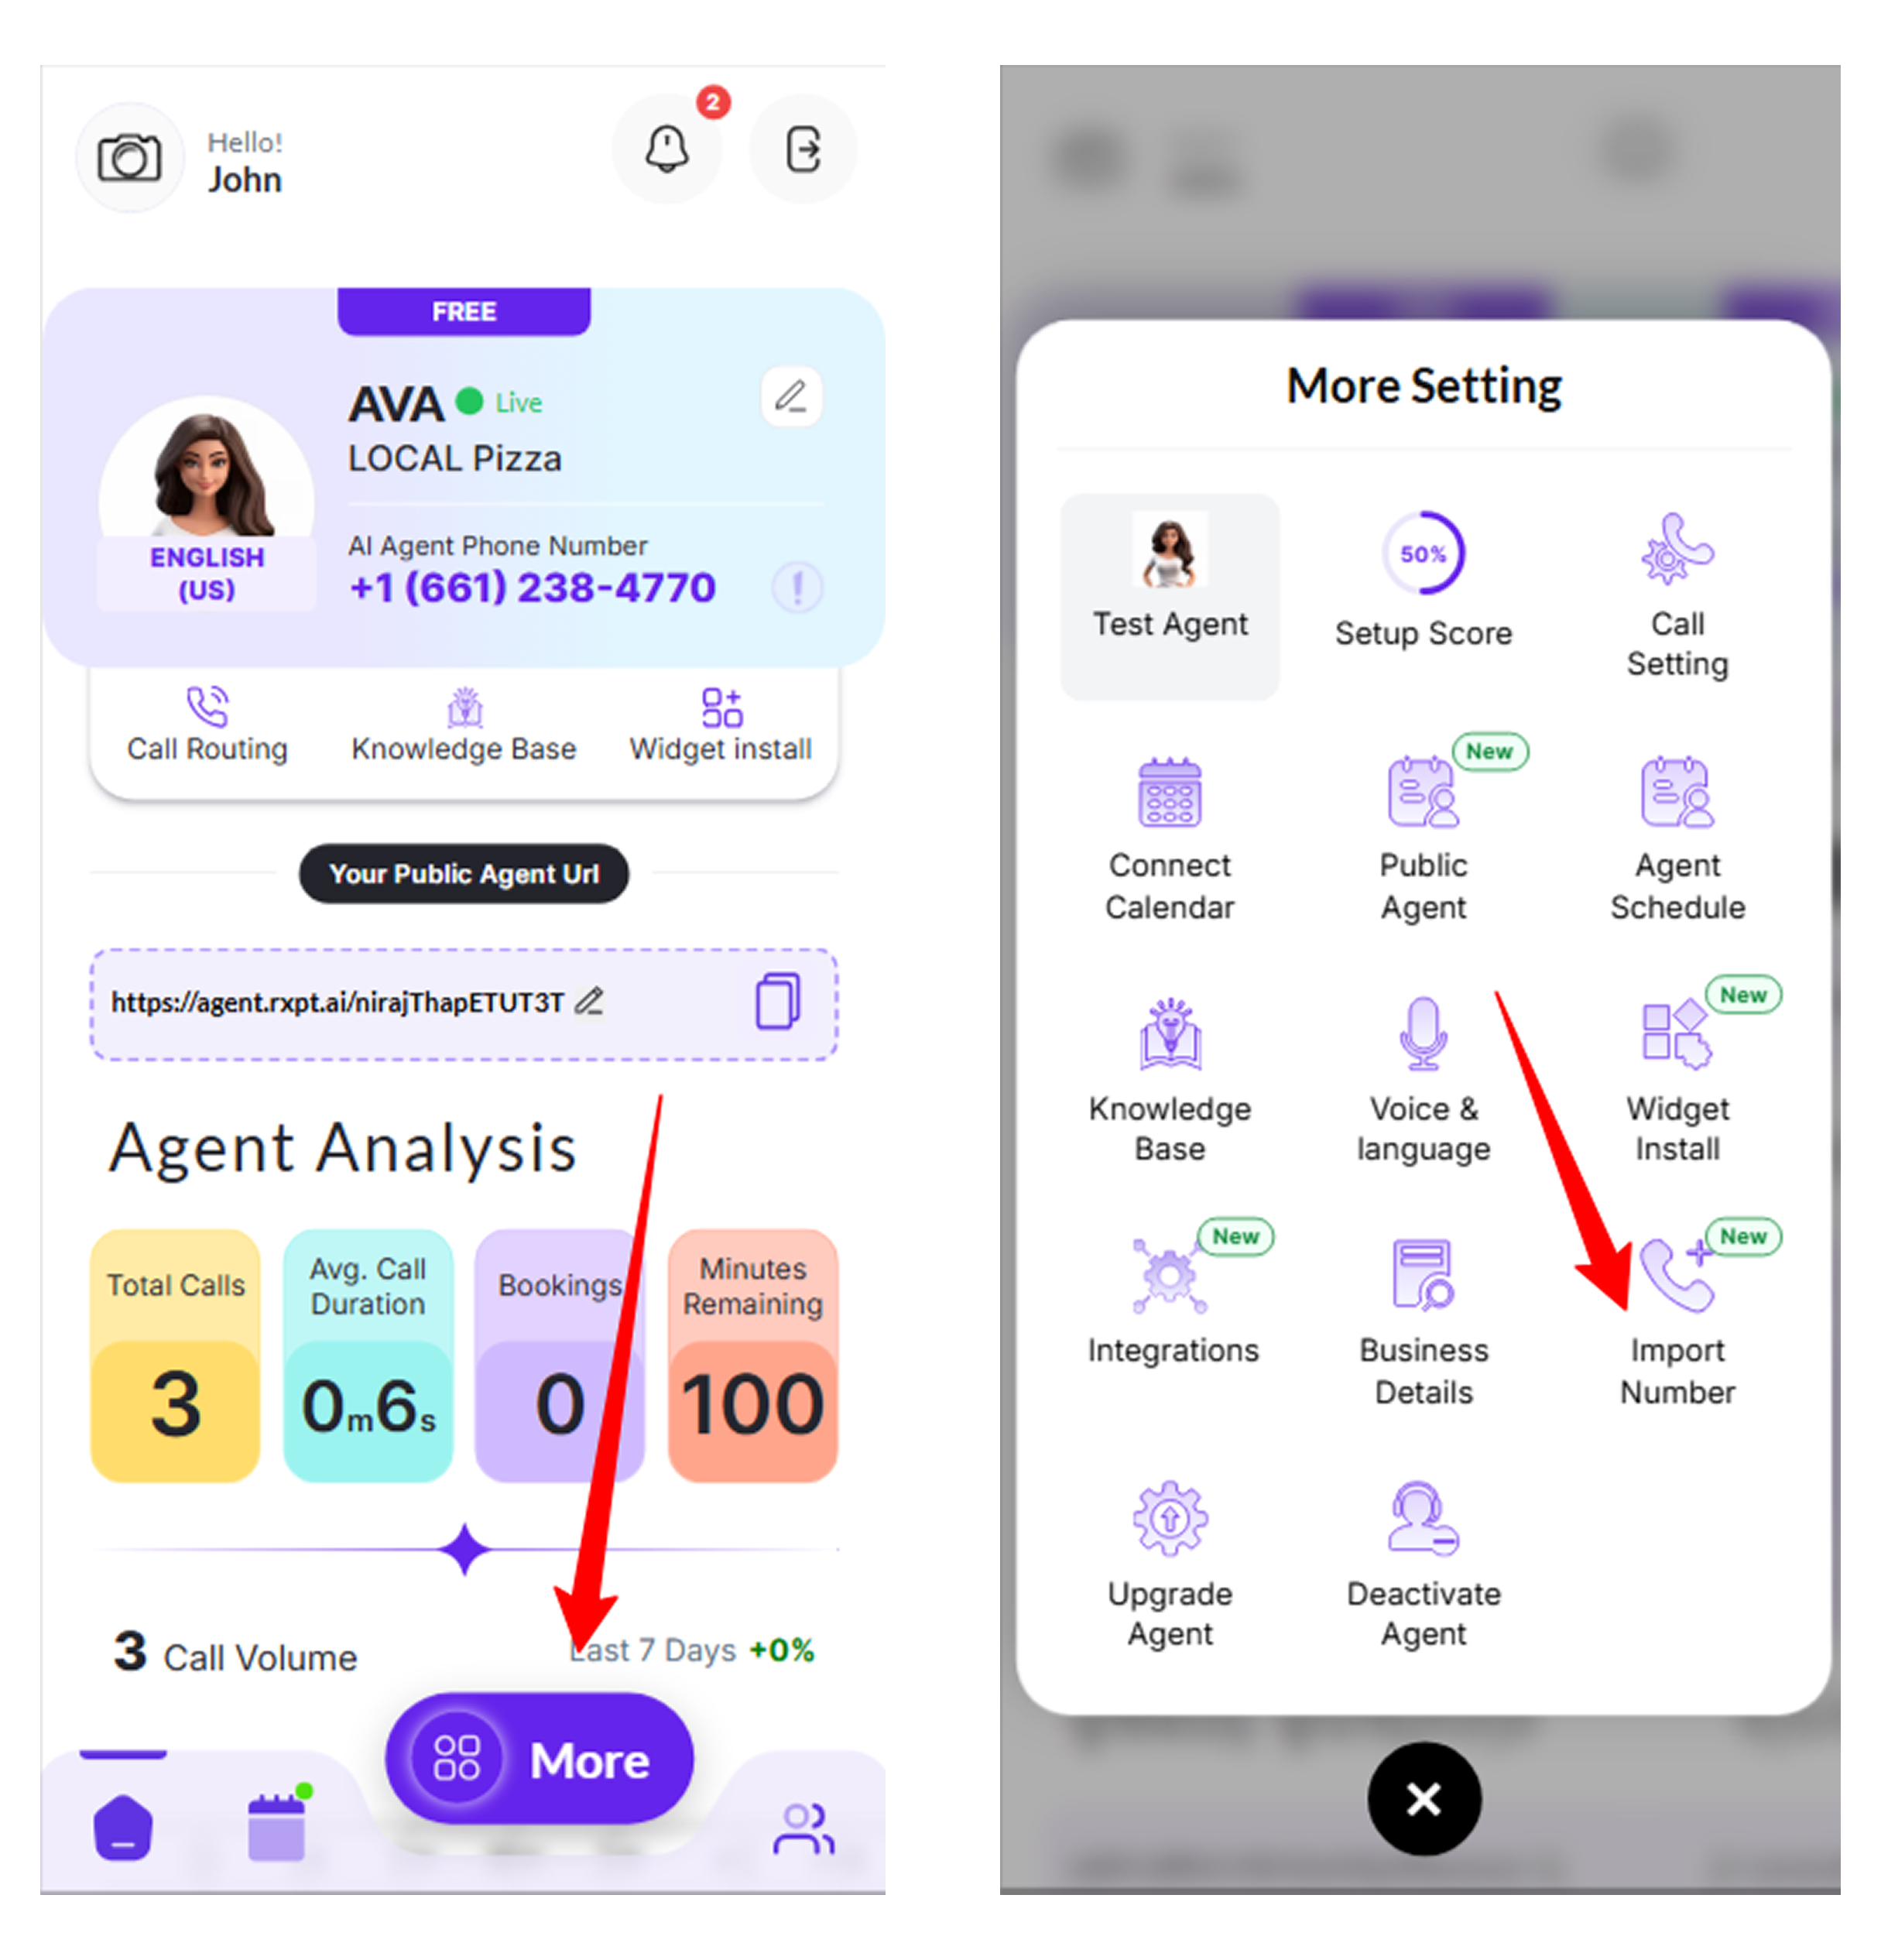
From the Rexpt dashboard, select More from the bottom navigation.
Step 2 — Select Import Number
In More Setting, select Import Number.
Set up SIP trunking with your provider
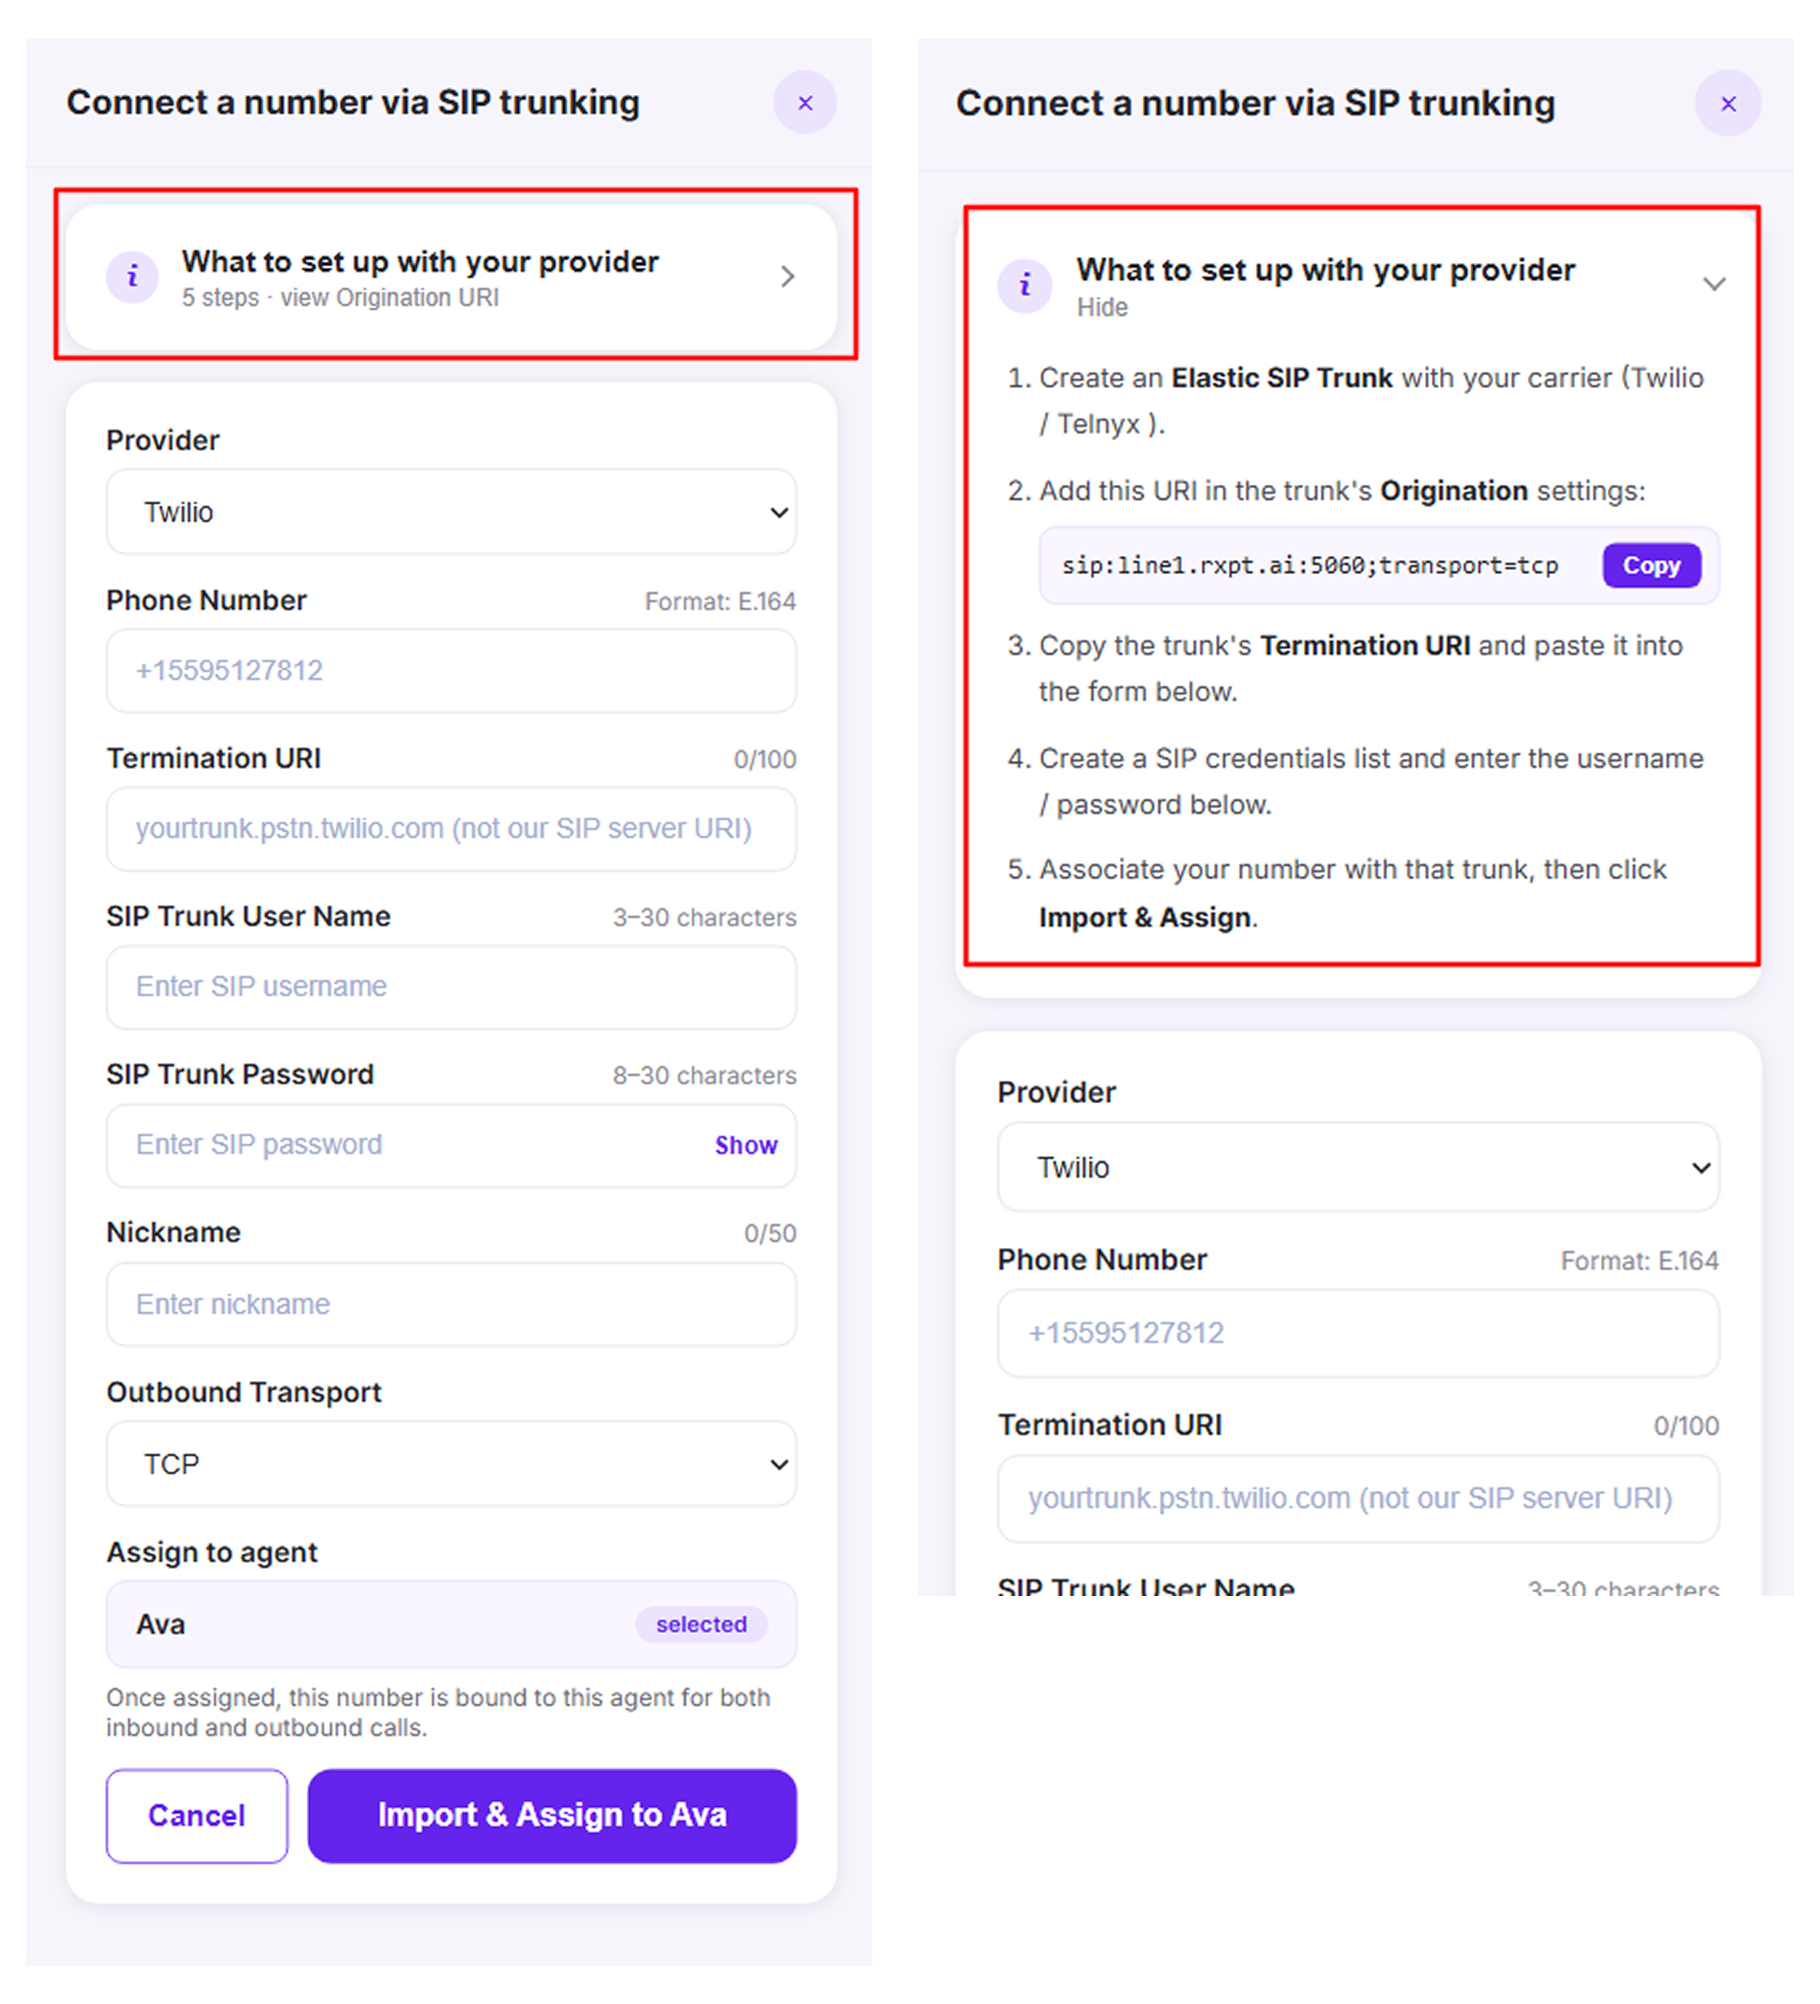
On the Connect a number via SIP trunking screen, open What to set up with your provider and follow the setup instructions shown by Rexpt.
Step 1 — Create the SIP trunk
Create the SIP trunk required for the number in your Twilio or Telnyx account.
Step 2 — Add the Rexpt Origination URI
Copy the Origination URI shown by Rexpt and add it to the trunk's Origination settings in your provider account.
Step 3 — Copy your provider's Termination URI
Copy the trunk's Termination URI from your provider and enter it in the Termination URI field in Rexpt.
Step 4 — Create SIP credentials
Create the SIP credentials required by your provider, then enter the SIP trunk username and password in Rexpt.
Step 5 — Associate the phone number with the trunk
In your provider account, associate the phone number you want to use with the SIP trunk.
Enter the number and SIP details
Complete the connection form in Rexpt. The current form includes:
- Provider — select the provider that manages the number.
- Phone Number — enter the number in E.164 format.
- Termination URI — enter the SIP Termination URI from your provider.
- SIP Trunk User Name — enter the username for the SIP trunk credentials.
- SIP Trunk Password — enter the password for the SIP trunk credentials.
- Nickname — enter a name that helps you identify the imported number.
- Outbound Transport — select the transport option for the connection.
- Assign to agent — select the AI Receptionist that should use this number.
Import and assign the number
Step 1 — Review the details
Confirm that the provider, phone number, Termination URI, SIP credentials, outbound transport, and selected agent are correct.
Step 2 — Import the number
Select Import & Assign to [Agent Name]. The button displays the name of the AI Receptionist selected in the form.
Once assigned, the screen indicates that the number is bound to that agent for both inbound and outbound calls.

Confirm your setup
Return to the dashboard and confirm that the expected phone number is shown for the AI Receptionist you selected.
Important details
- Use the Origination URI provided by Rexpt in your provider's trunk configuration.
- Enter your provider's Termination URI in Rexpt.
- Enter the phone number in E.164 format.
- The imported number is assigned to the selected AI Receptionist for inbound and outbound calls.