Before you begin
Make sure you have access to your Rexpt dashboard and the AI Receptionist you want to update.
Edit Agent Details
Change the AI Receptionist’s identity or role when you want to update how the agent is presented to callers or change the type of calls it is designed to handle.
Step 1 — Open your AI Receptionist settings
From your Rexpt dashboard, open the AI Receptionist you want to edit and open the available settings.
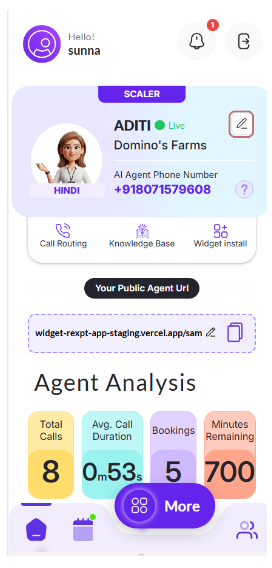
Step 2 — Change the agent name and avatar
Update the Agent Name and choose an avatar that represents how you want your AI Receptionist to appear.
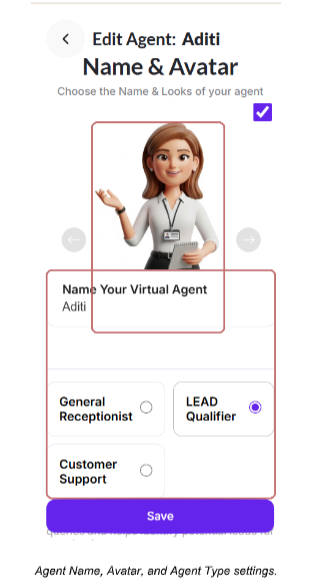
Step 3 — Change the agent type
Select the type that best matches the primary role you want your AI Receptionist to perform.
- General Receptionist — Handles general incoming calls, routine business questions, and basic caller requests.
- Lead Qualifier — Focuses on potential customers by asking relevant questions, understanding their requirements, and collecting information to help qualify leads.
- Customer Support — Focuses on existing customers by handling support-related questions, understanding their concerns, and guiding callers toward the appropriate next step.
Edit Business Details
Update your business information when details change or the existing information is incorrect, so your AI Receptionist can provide callers with accurate business information.
Step 1 — Open Business Details
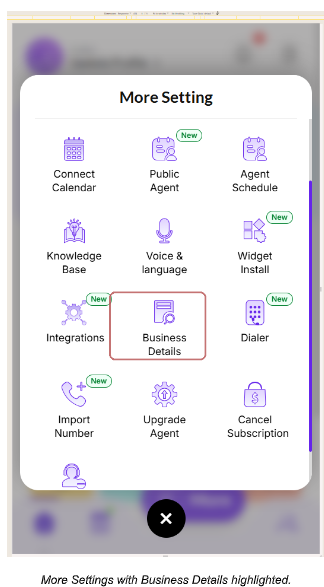
From More Settings, select Business Details.
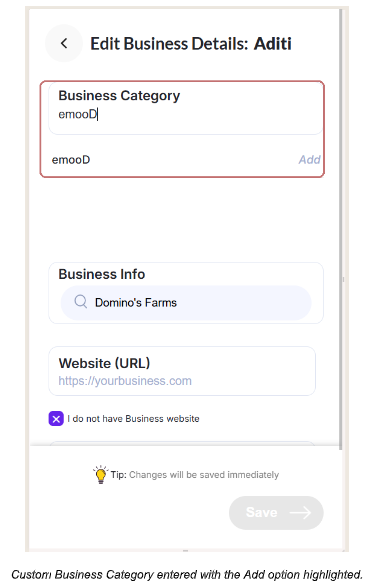
Step 2 — Change the business category
Search for the category that best matches your business and select it from the available results.
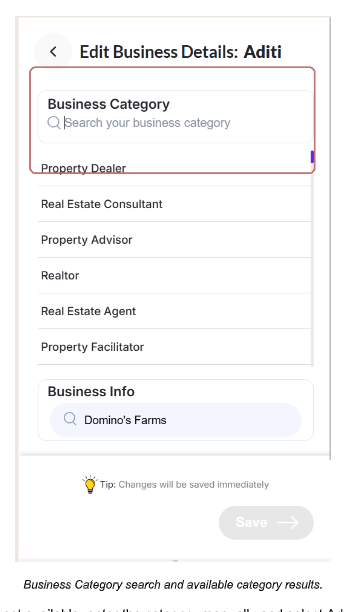
If the required category is not available, enter the category manually and select Add.
Step 3 — Change your business information
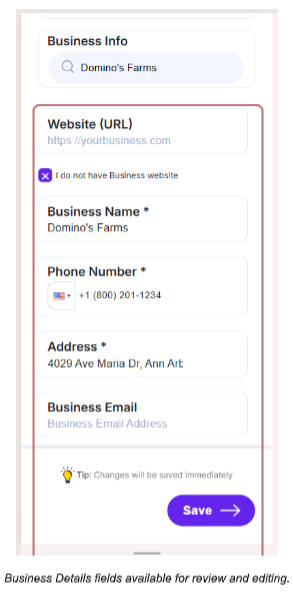
Update the business information as needed, including the website, business name, phone number, address, and business email.
You can search for your business by name to use available business listing information. If your business cannot be found, enter the information manually. If you do not have a website, select I do not have Business website.
Step 4 — Save your changes
Select Save to apply the updated business details.
[Screenshot placeholder — 3 screens horizontally: More Settings with Business Details | Business Category search/custom Add | Business Details fields]
Edit Voice & Language
Change the language, gender, or voice when you want your AI Receptionist to communicate with callers in a way that better matches your business and customer preferences.
Step 1 — Open Voice & language
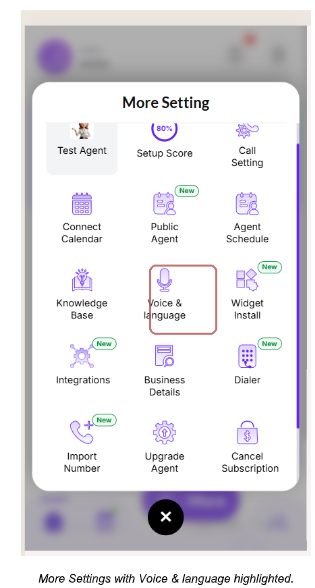
From More Settings, select Voice & language.
Step 2 — Change the language
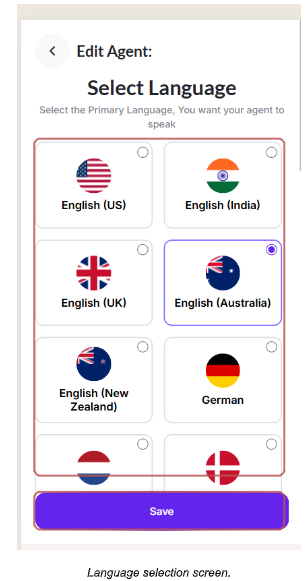
Select the primary language or regional language option you want your AI Receptionist to use, then save your selection.
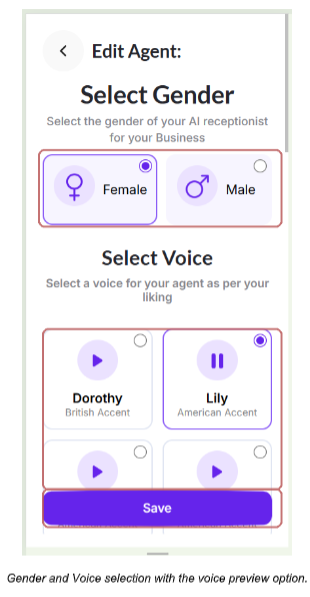
Step 3 — Change the gender and voice
Select a gender and choose a voice. Use Play to preview the available voice before selecting it, then save your changes.
Confirm Your Changes
Review the updated agent details, business information, and voice settings to confirm that they match how you want your AI Receptionist to operate and communicate with callers.
Related Guides
- Test Your AI Receptionist
- Configure Call Triage
- Set Up Call Forwarding
- Connect Your Calendar