Before you begin
Make sure you have access to your Rexpt dashboard and the AI Receptionist whose calendar activity you want to review.
Open Calendar
Open the Calendar to view your AI Receptionist’s bookings and received calls organized by date.
Step 1 — Open the Calendar
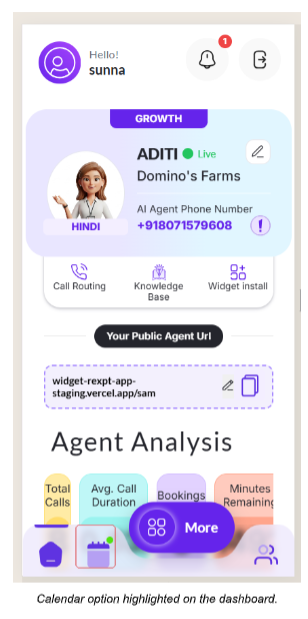
From your Rexpt dashboard, select the Calendar icon to open the Calendar page.
Understand Calendar Activity
Use the calendar markers to quickly identify dates with bookings or received calls and see the activity count for each date.
Step 1 — Identify activity on a date
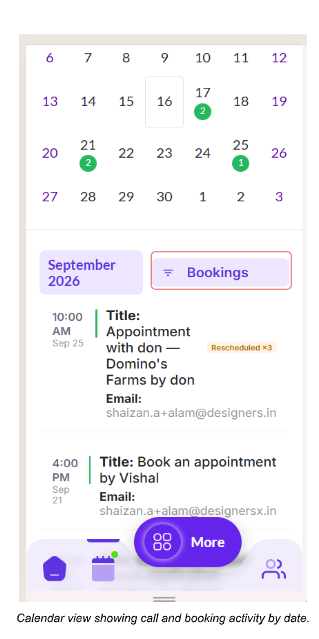
- Orange indicates Calls Received.
- Green indicates Bookings.
- The number inside a colored marker shows the count of that event type on the date.
For example, an orange marker with 8 represents eight received calls on that date, while a green marker with 2 represents two bookings.
View Bookings and Calls
Filter the event list when you want to view all activity, only scheduled bookings, or only received calls for the selected date.
Step 1 — View All Events
Select All Events from the event-type dropdown to display both bookings and received calls in the event list.
Step 2 — View Bookings
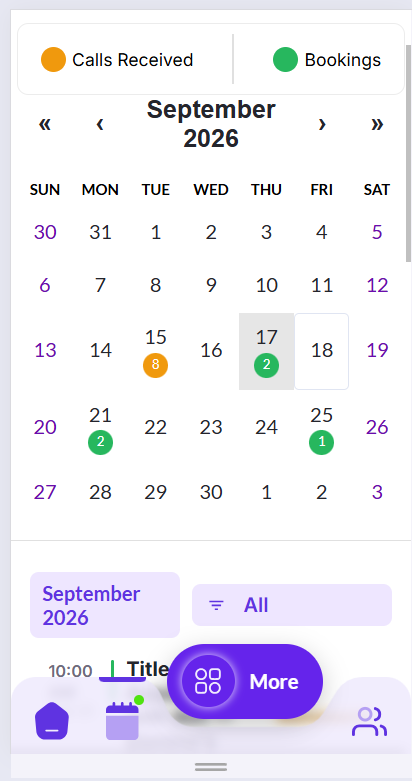
Select Meetings Booked from the event-type dropdown to display scheduled meetings for the selected date. A booking can show the meeting time, date, title, email, and Meeting Booked status.
If a meeting has been rescheduled, the Rescheduled ×N tag shows how many times it has been rescheduled. For example, Rescheduled ×3 means the meeting was rescheduled three times.
Step 3 — View Calls Received
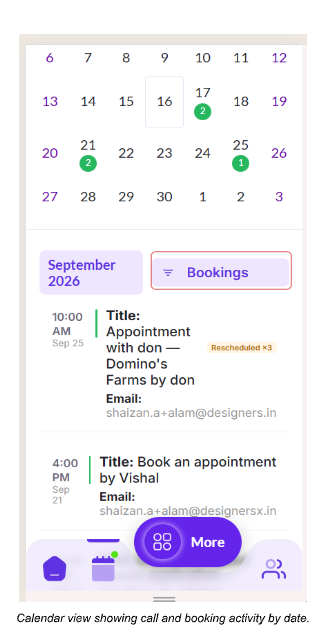
Select Calls Received from the event-type dropdown to display received calls for the selected date. Each call entry shows the call time, caller name, and call channel.

View Activity for a Different Date
Select another date when you want to review the bookings or calls associated with a different day.
Step 1 — Select a date
Select the required date in the calendar. The event list updates to show activity for that selected date.
Connect Your Calendar
Connect your Google Calendar with Rexpt so your Rexpt bookings can be synced with your external calendar. This gives you one place to keep track of scheduled meetings.
Step 1 — Open Connect Calendar
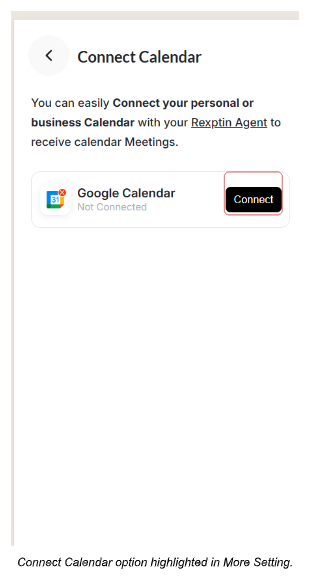
From the dashboard, open More to access More Setting, then select Connect Calendar.
Step 2 — Connect Google Calendar
On the Connect Calendar page, select Connect next to Google Calendar.
Step 3 — Continue with Google Calendar
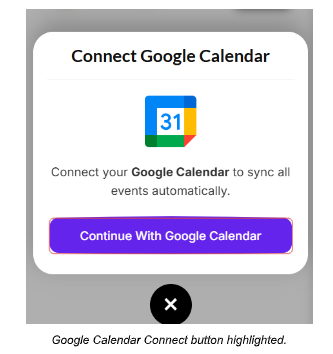
In the connection dialog, select Continue With Google Calendar to continue with Google authorization.
Step 4 — Select your Google account
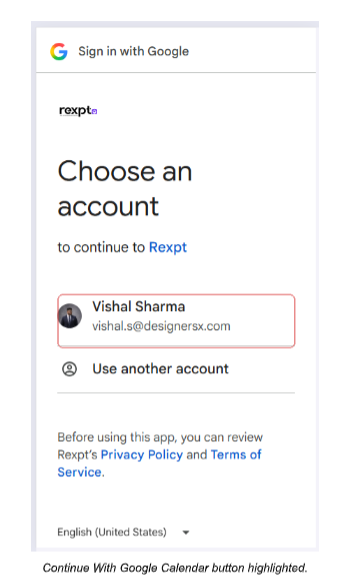
Select the Google account you want to connect and complete the authorization steps shown by Google.
Step 5 — Confirm the calendar is connected
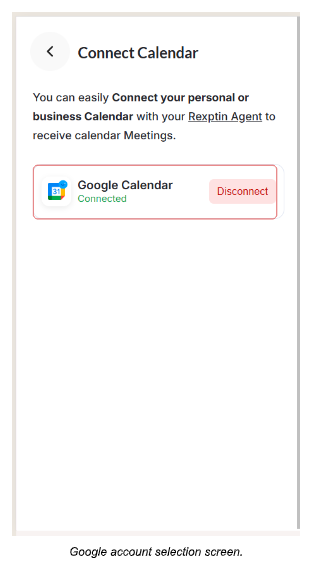
After the connection is completed, the Connect Calendar page shows Google Calendar as Connected and provides a Disconnect option. This confirms that the external calendar is linked to Rexpt.
How Calendar Sync Works
Understand what happens to Rexpt bookings depending on whether Google Calendar is connected.
- When Google Calendar is connected, Rexpt bookings are automatically synced with the connected Google Calendar.
- When Google Calendar is not connected, you can still create bookings through Rexpt, but they are not automatically synced to Google Calendar.
This connection lets you keep your scheduled meetings available in Rexpt and your external Google Calendar in one place.
Confirm Your Setup
Confirm that the selected calendar date and event type match the activity you want to review. If Google Calendar is connected, verify that the Connect Calendar page shows Connected and that your Rexpt bookings are available in the connected calendar.
Related Guides
- Call History and Call Details
- Edit Your AI Receptionist
- Test Your AI Receptionist